Understanding Time Zones in Magento 2
When managing your e-commerce store with Magento 2, one critical aspect is setting the correct time zone. This ensures that your orders, customer communications, and product updates reflect the proper timing relevant to your location and audience. Correct time zone settings help facilitate smooth operations and enhance customer satisfaction.
Steps to change Time Zone from the Admin
To change the time zone in Magento 2, follow these simple steps:
- Log into your Magento 2 Admin Panel.
- Navigate to Stores > Configuration.
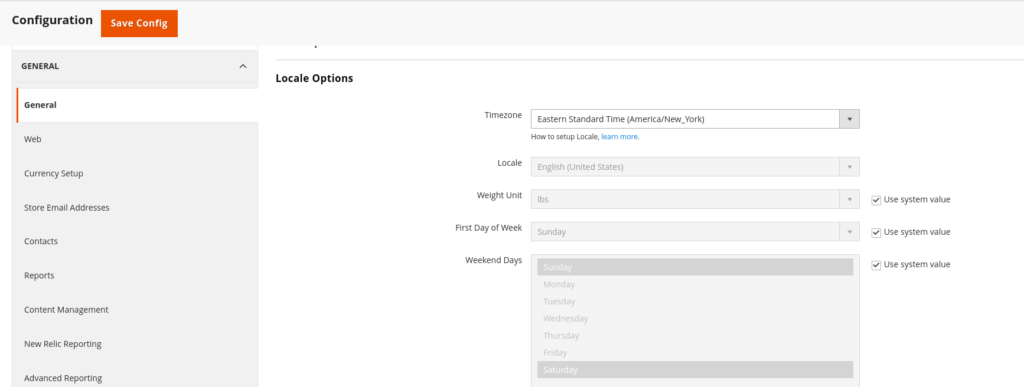
- In the General section, click on Locale Options.
- Find the Time Zone drop-down menu, and select your desired time zone.
- Once selected, click Save Config to apply the changes.

It’s a straightforward process, but it’s vital to ensure the settings match your operational needs.
Change Time Zone from the CLI
We can change Time Zone of the store through command line. To check the Time Zone please run below command from the project root directory.
bin/magento config:show general/locale/timezoneTo change the Time Zone please run below command.
bin/magento config:set general/locale/timezone Asia/KolkataVerifying Your Time Zone Settings
After updating your Magento 2 time zone, it’s essential to verify that the changes have been applied correctly. You can do this by checking the timestamps on orders and other time-sensitive data in your admin panel. If the timestamps reflect the correct local time, your settings are accurate.
By following these steps, you can efficiently manage your Magento 2 time zone settings, ensuring that your e-commerce operations align perfectly with your specific time requirements.
You can refer for Locale configuration from the here.


